Difference between revisions of "Seon Webaccess creating a send job"
| Line 16: | Line 16: | ||
Aborting a send job by clicking the "abort" button [[Image:Webaccess cancel new send job.png]] removes all uploaded files, discards any selections and closese this tab after accepting this action. | Aborting a send job by clicking the "abort" button [[Image:Webaccess cancel new send job.png]] removes all uploaded files, discards any selections and closese this tab after accepting this action. | ||
| + | |||
| + | ---- | ||
<center> | <center> | ||
[[Image:Seon Webaccess creating new send job.png]] | [[Image:Seon Webaccess creating new send job.png]] | ||
</center> | </center> | ||
Revision as of 12:44, 27 June 2013
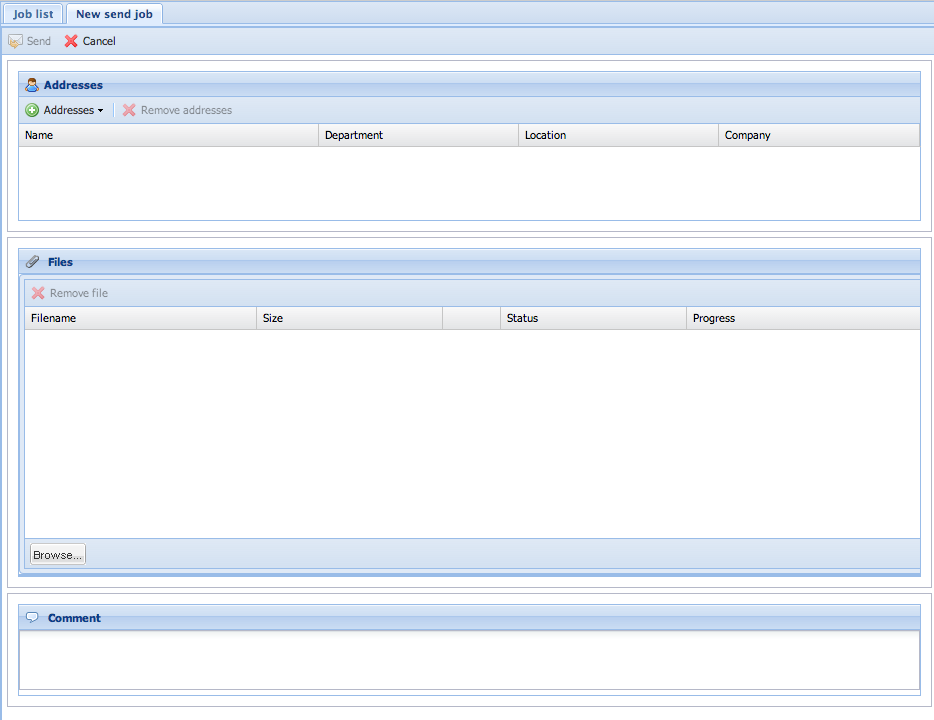
By clicking on the top-left icon ![]() you create a new collection for a new send job. A tab window opens, where all needed information are needed:
you create a new collection for a new send job. A tab window opens, where all needed information are needed:
This new window is divided into the four sections:
- Toolbar icons (header)
- Recipient(s)
- File(s)
- Comment
At least one recipient and one file has to be added to fulfill the requirements of a new send job. The interaction button for "send job" is disabled by default ![]() and gets activated after all needed information are gathered:
and gets activated after all needed information are gathered: ![]() .
.
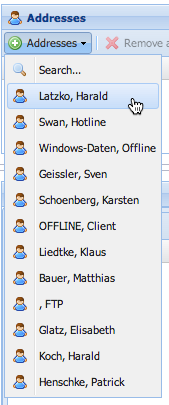
If you have already sent Seon jobs to recipients, the last recipients are accessible via a menu on the "Addresses" button.
You can configure the amount of entries available here.
Aborting a send job by clicking the "abort" button ![]() removes all uploaded files, discards any selections and closese this tab after accepting this action.
removes all uploaded files, discards any selections and closese this tab after accepting this action.

