Seon VMware virtualized image - mail configuration
The Seonvirtual Linux environment comes with a pre-installed Mail Transfer Agent (MTA) called "Exim" in version 4. You can configure Exim4 to your needs in order to send emails within your system environment.
Contents
Basics
Exim4 is best configured on command line (i.e. via SSH) via a dialog based system. This system easily helps you to accomplish your configuration task.
The command to be executed as root is:
dpkg-reconfigure exim4-config
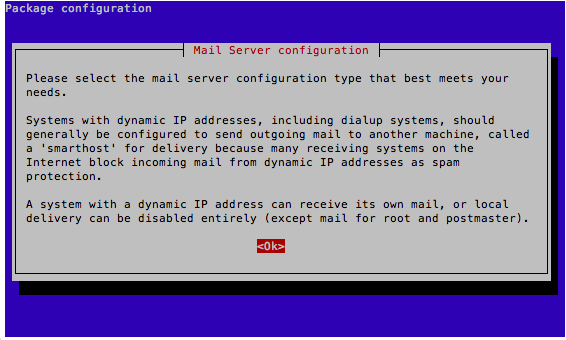
The following informational prompt asks you to confirm the "OK" button:
Direct mail sending - without mail relay
If you can send emails directly via SMTP (i.e. your Seon machine has direct internet access), you can choose the first option "internet site; mail is sent and received directly using SMTP":
You will then need the following settings:
- System mail name: The full qualified domain name (FQDN) of the Seon system (i.e. "
seon.de", "c-works.de" or whatever your mail domain is). - IP-addresses to listen on for incoming SMTP connections: (keep default)
127.0.0.1 ; ::1 - Other destinations for which mail is accepted: (keep default)
- Domains to relay mail for: (keep default) [empty]
- Machines to relay mail for: (keep default) [empty]
- Keep number of DNS-queries minimal (Dial-on-Demand)? (keep default) No
- Delivery method for local mail: (keep default or change to whatever your prefered type is)
mbox format in /var/mail/ - Split configuration into small files? (keep default) No
Mail sending over SMTP relay (aka. "smarthost")
If your network provides an existing mail server, the option "mail sent by smarthost; received via SMTP or fetchmail" will be the best one:
- System mail name: The full qualified domain name (FQDN) of the Seon system (i.e. "
seon.de", "c-works.de" or whatever your mail domain is). - IP-addresses to listen on for incoming SMTP connections: (keep default)
127.0.0.1 ; ::1 - Other destinations for which mail is accepted: (keep default)
- Machines to relay mail for: (keep default) [empty]
- IP address or host name of the outgoing smarthost: The IP/hostname of the relay host.
- Hide local mail name in outgoing mail? (keep default) No
- Keep number of DNS-queries minimal (Dial-on-Demand)? (keep default) No
- Delivery method for local mail: (keep default or change to whatever your prefered type is)
mbox format in /var/mail/ - Split configuration into small files? Yes
Relay authentification
If you need to authenticate against an existing relay host with a given username and password, you have to do the following:
- Edit the file "
/etc/exim4/passwd.client" with your favorite editor (i.e. "vi")
vi /etc/exim4/passwd.client
- Add a line with the following syntax:
yourdomain.com:user@yourdomain.com:yourpassword
- Reload the configuration of Exim:
update-exim4.conf
Change sender's mail address
Seon's mailing functionality is running as a configured user (which is normally the webserver user, in this case "www-data"). You can configure that this user ("www-data") is mapped to another outgoing email address.
In our example, all mails sent by Seon shall be sent by the email address "seon@mydomain.com":
- Edit the file "
/etc/email-addresses" with your favorite editor, i.e. "vi":
vi /etc/email-addresses
- Add a line with the configured user running Seon ("
www-data"):
www-data: seon@mydomain.com
Troubleshooting
In any case of problems, take a look at Exim's log file:
tail -f /var/log/exim4/mainlog
You can send emails with the system's "sendmail" program:
echo test > sendmail contact@seon.de

