Difference between revisions of "Seon Webaccess adding recipients"
From Seon
| Line 5: | Line 5: | ||
Select one of the pre-used entries or search for entities by using the "Search..." function. | Select one of the pre-used entries or search for entities by using the "Search..." function. | ||
| − | |||
[[Image:Seon Webaccess add recipient.png]] | [[Image:Seon Webaccess add recipient.png]] | ||
| − | + | ||
| + | During typing information in the search field, the content changes dynamically and instantly. In order to select recipient(s), you have several options: | ||
| + | *Activate the required rows by clicking on them, marking them blue and press the button "Accept" on the bottom. | ||
| + | *Doubleclick on one row. The selected row will be taken over to the selected addresses and the search window closes instantly. | ||
| + | |||
| + | In any case, an informational popup window informs you that the import of the persons has taken place. | ||
Latest revision as of 12:53, 27 June 2013
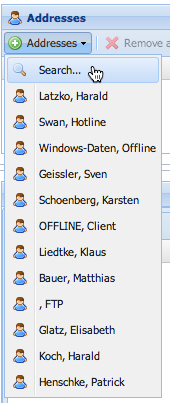
In order to add one or more recipients to the send job, click on the "Addresses" button. If you have not addressed any Seon send job to an active (=non-deleted) person, this list doesn't exist and pressing the button leads you directly to the "search" window.
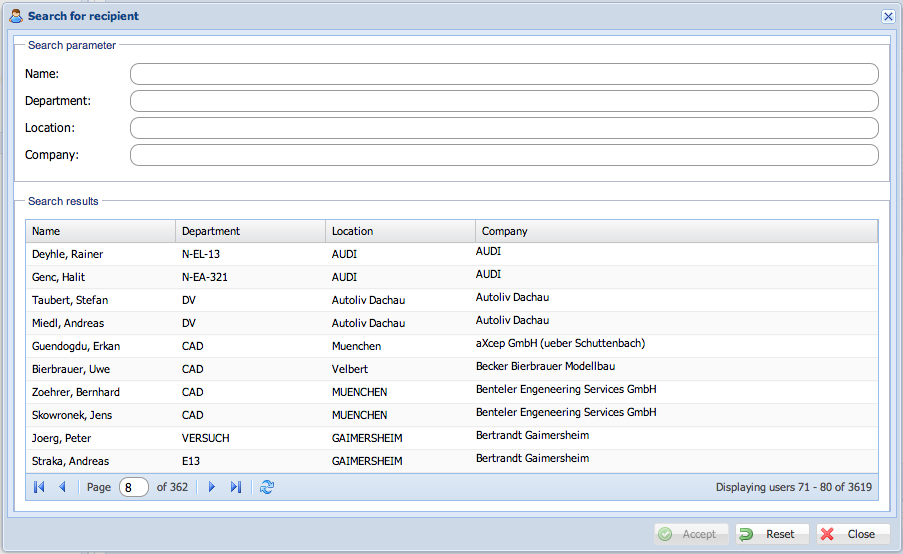
Select one of the pre-used entries or search for entities by using the "Search..." function.
During typing information in the search field, the content changes dynamically and instantly. In order to select recipient(s), you have several options:
- Activate the required rows by clicking on them, marking them blue and press the button "Accept" on the bottom.
- Doubleclick on one row. The selected row will be taken over to the selected addresses and the search window closes instantly.
In any case, an informational popup window informs you that the import of the persons has taken place.

