Seon VMware virtualized image - conversion
In order to run the pre-configured VMware virtualized Seon image "Seonvirtual" in a vSphere ESX or ESXi environment, you have to convert it according to VMware's guidelines: http://www.vmware.com/products/converter/overview.html
If you don't have the converter installed on a machine of your choice (Windows only), you have to download it in the latest version, respecting your VMware hosts's version, in order to convert the image. For downloading the program, you must be a registered VMware user. Login into you account with your credentials in order to download and install the program.
Procedure
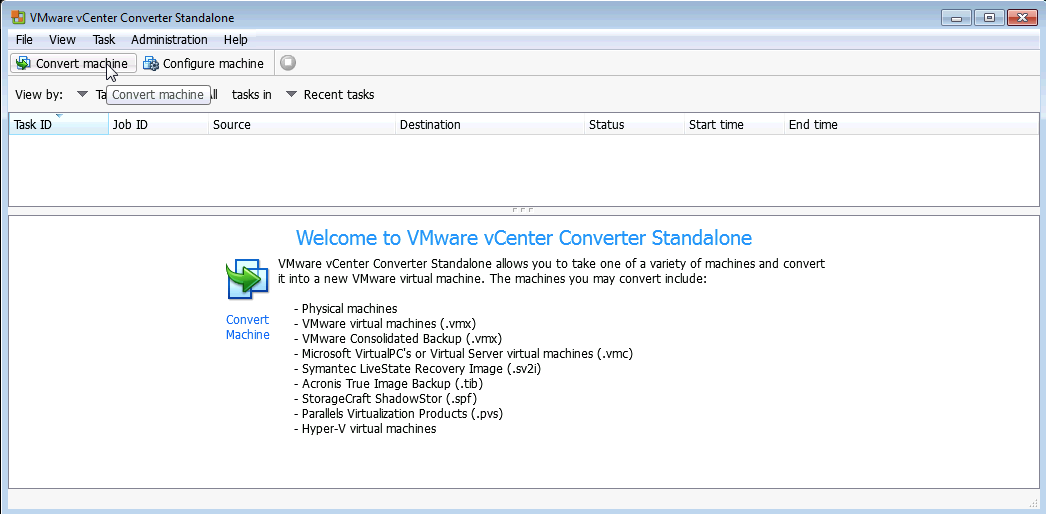
After installation of the VMware vCenter Converter Standalone Client (consult your VMware installation for deciding if you want to install the standalone version or the server version of the converter), start it up. The following screen will welcome you:
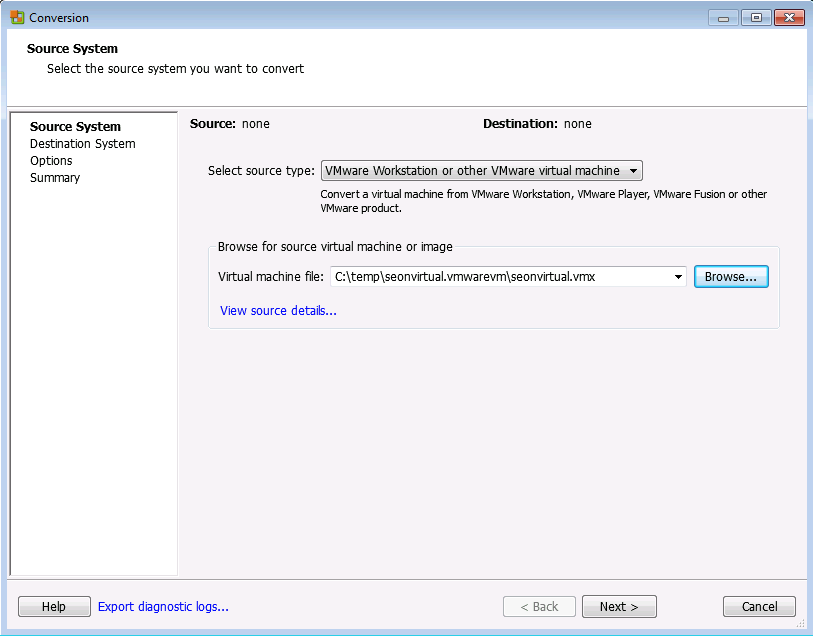
Click on the "Convert machine" on top of the window or select "File" -> "New" -> "Convert machine" (or press ctrl+M) in order to start the wizard for the converting process:
As source type use the pre-selected value "VMware Workstation or other VMware virtual image". In the field "Virtual machine file", select the downloaded and extracted VMware image of Seonvirtual (namely: Seonvirtual.vmx). Click on "Next".
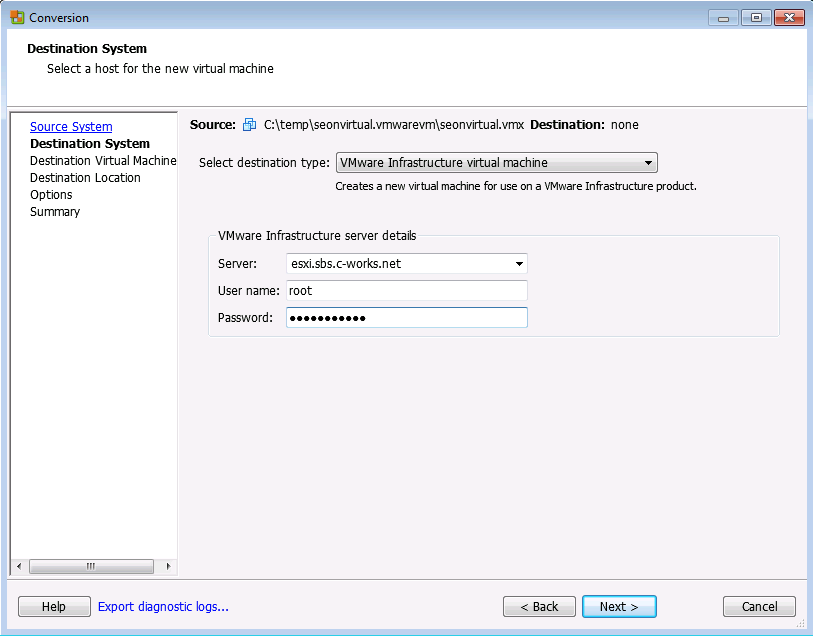
As the destination, use the pre-selected destination type value "VMware infrastructure virtual machine" in order to import the machine to an ESX(i) host. Enter the valid information of IP address or resolvable hostname of the ESX(i) host, the username of an administrative user who has the permission to create and modify virtual machines on this ESX(i) host and its password. Click on "Next":
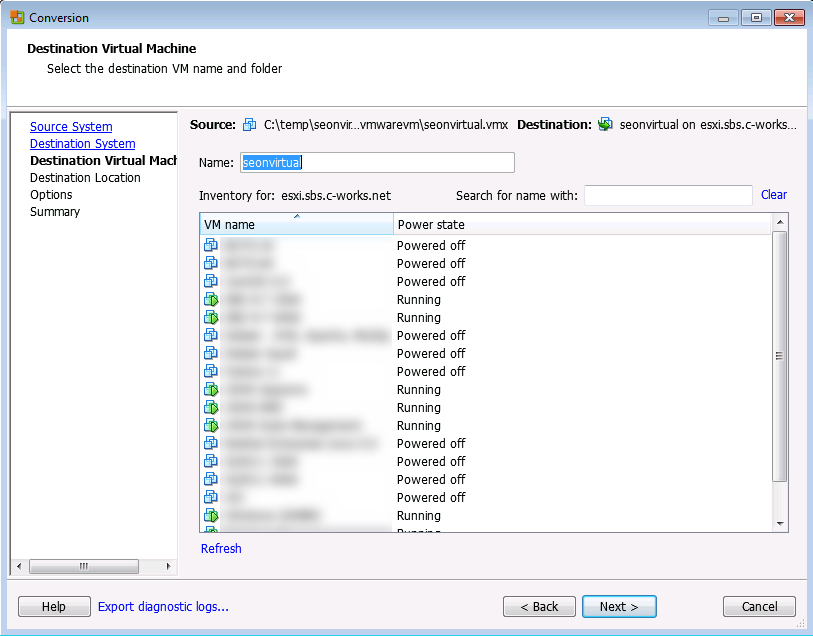
In the next screen, give the new imported virtual machine a unique name, then click on "Next":
In the next step "Destination location" selection, select the used datastore for the virtual machine to be imported via the combobox in the fieldset "Datastore". You can change the version of the virtual machine in the combobox in the fieldset "Virtual machine version", if you have any standards about this value. The preset value should be ok. Click on "Next".
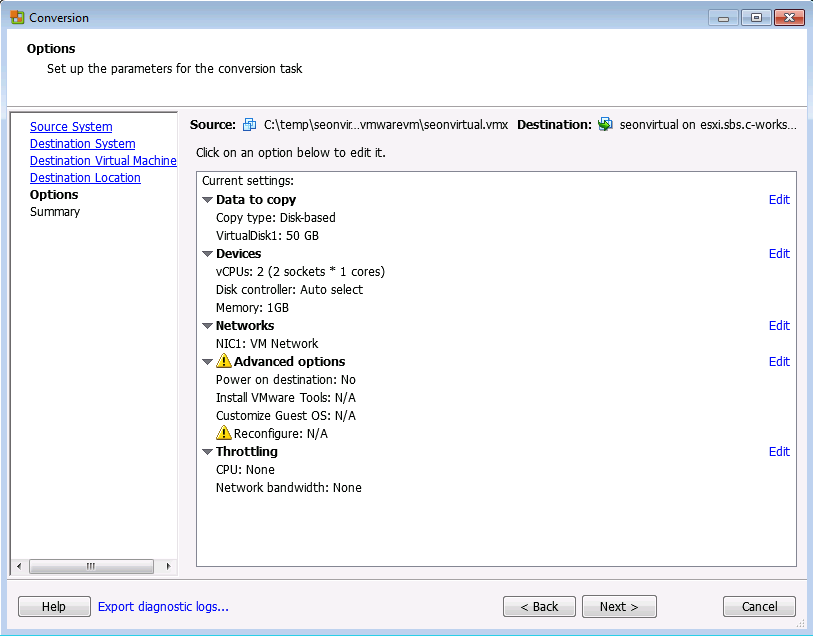
The step "Options" lets you modify VMware specific options of the virtual machine, such as performance parameters, virtualized hardware configuration, image behaviour etc. Choose them wisely according to you own VMware virtual machine policy, maybe the defaults should be ok for most VMware environments. Afterwards, click "Next".
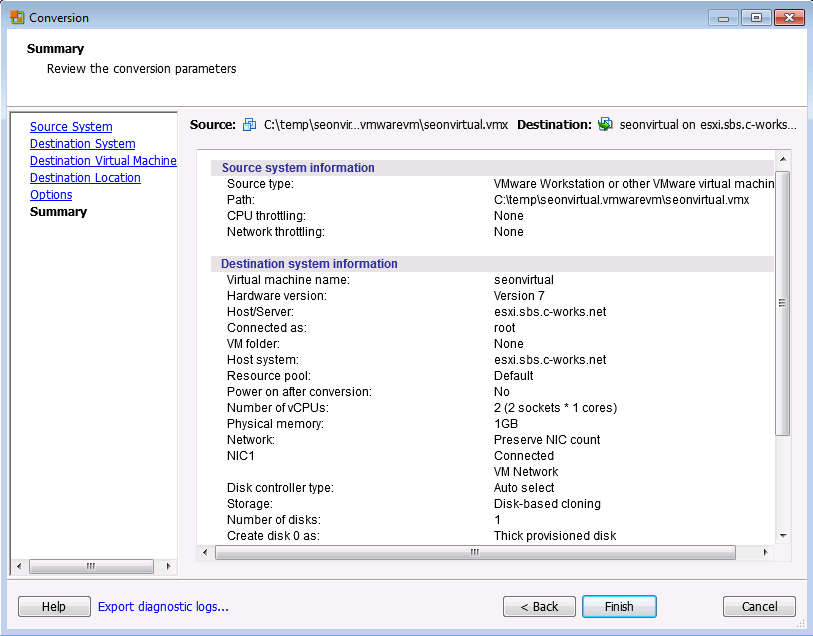
Before the conversion process starts, a summary show all parameters used for this import process. Check them carefully, you can change every parameter by clicking on "Back" in order to access the corresponding configuration step. If everything is ok, click on "Finish" and the conversion process starts.
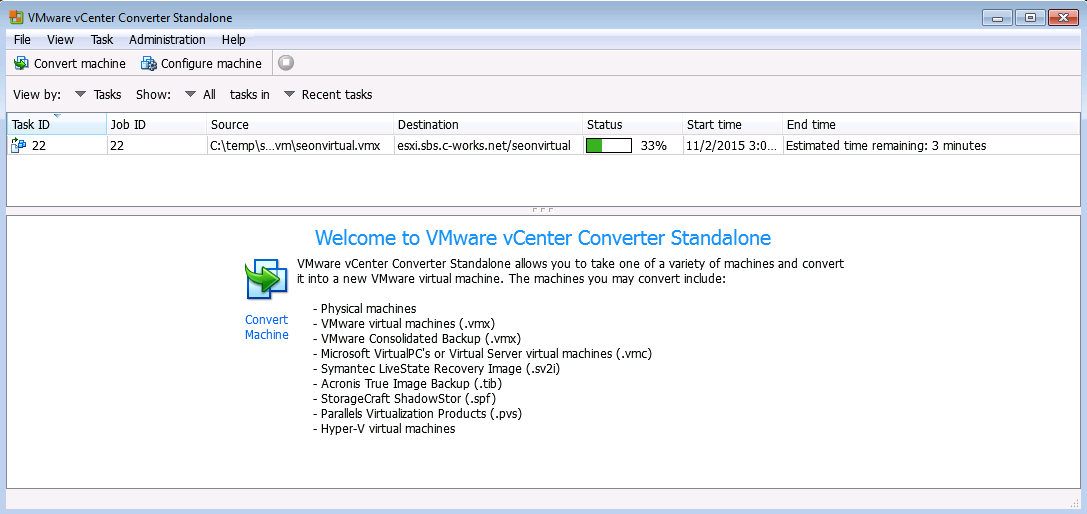
You can inspect the conversion process in the conversion client, after the successful conversion the Vmware virtual machine is available in the ESX(i) environment.
